We continue our series introducing one of the world’s most popular online generative AI video production toolkits, as we create a short video for a brand new immersive experience.
The AI tools and models used in this series
We’ll use runway.ml to generate video clips and assemble them into a sequence, and we’ll use additional AI tools to help with initial ideation and to create text prompts to use at runway to help generate high quality video clips.
The main steps in the project:
- Generate an overview for an ‘immersive experience’ promotional video using perplexity.ai
- Generate still images using the flux-1.1-pro model at replicate.com to use as ‘first frame’ prompts at runway
- Generate short video clips using runway’s latest Gen-4 model
- Use runway’s online video editor to sequence the promotional video
- Use the speech-02-hd AI model at replicate.com to generate a realistic-sounding voiceover
- Use udio.com to generate a background music track
- Add text titles and export the video file
Part 5: Use Runway’s video editor to sequence video clips
Runway incorporates a browser-based multi-track video editor for sequencing video clips, stills, sound and text into a final project.
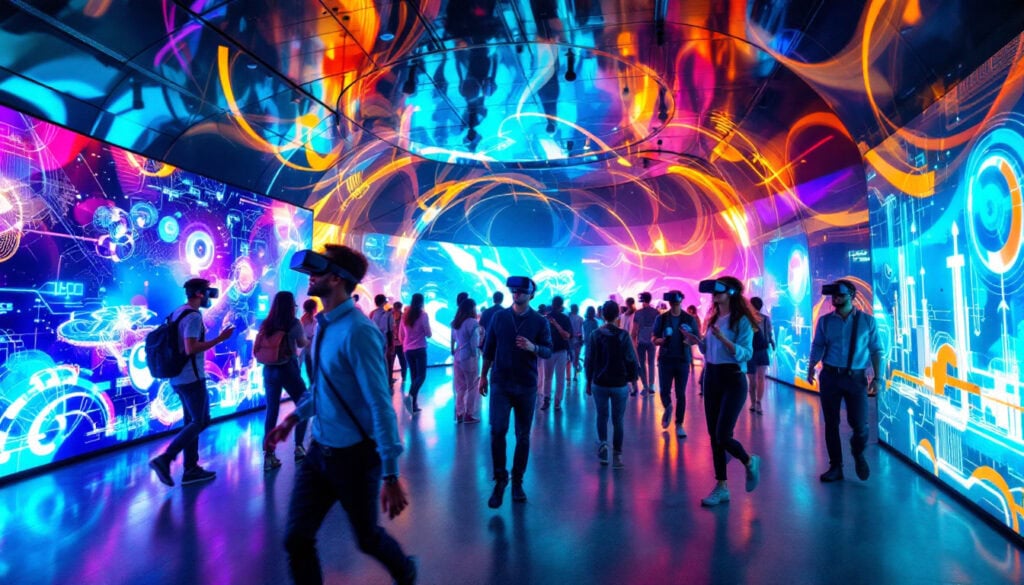
As a reminder, here are the stills used as prompts to generate the six video clips. For full information about how they were generated please see the previous parts of this series.


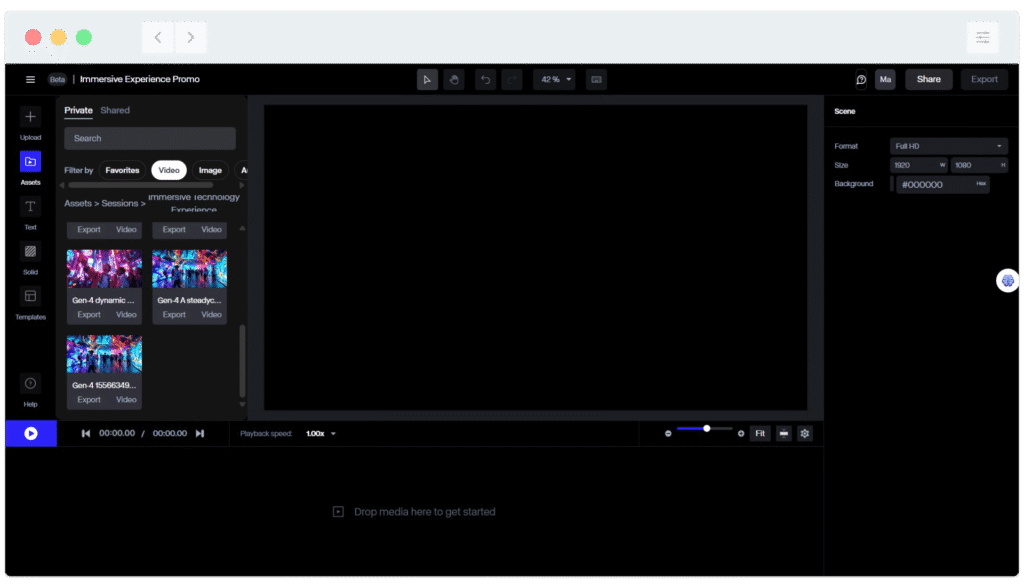
STEP 1: Open the Runway video editor by clicking ‘Video editor projects’ on the dashboard. Navigate to the Runway folder containing the generated video clips:
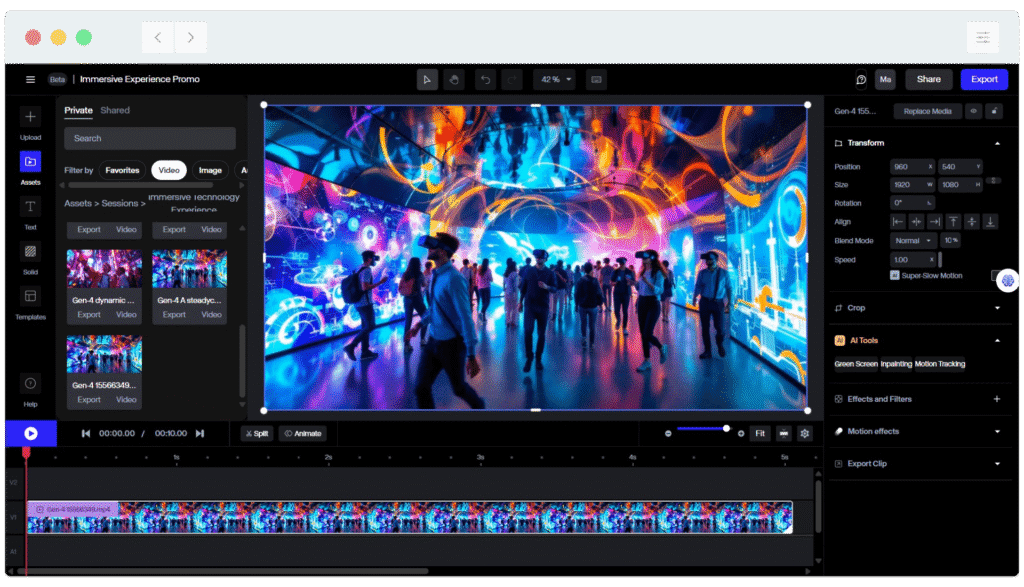
STEP 2: Drag the first video clip of the sequence on to the timeline, then drag the remaining clips onto the sequence in the prefered order. To play back the sequence press your spacebar or the blue and white ‘play’ icon at the top left of the timeline:
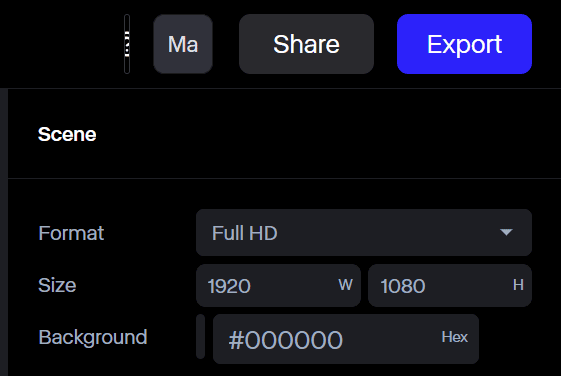
You can adjust the project settings by adjusting the options at the top right of the window. The default settings are 1080p video with a black background:
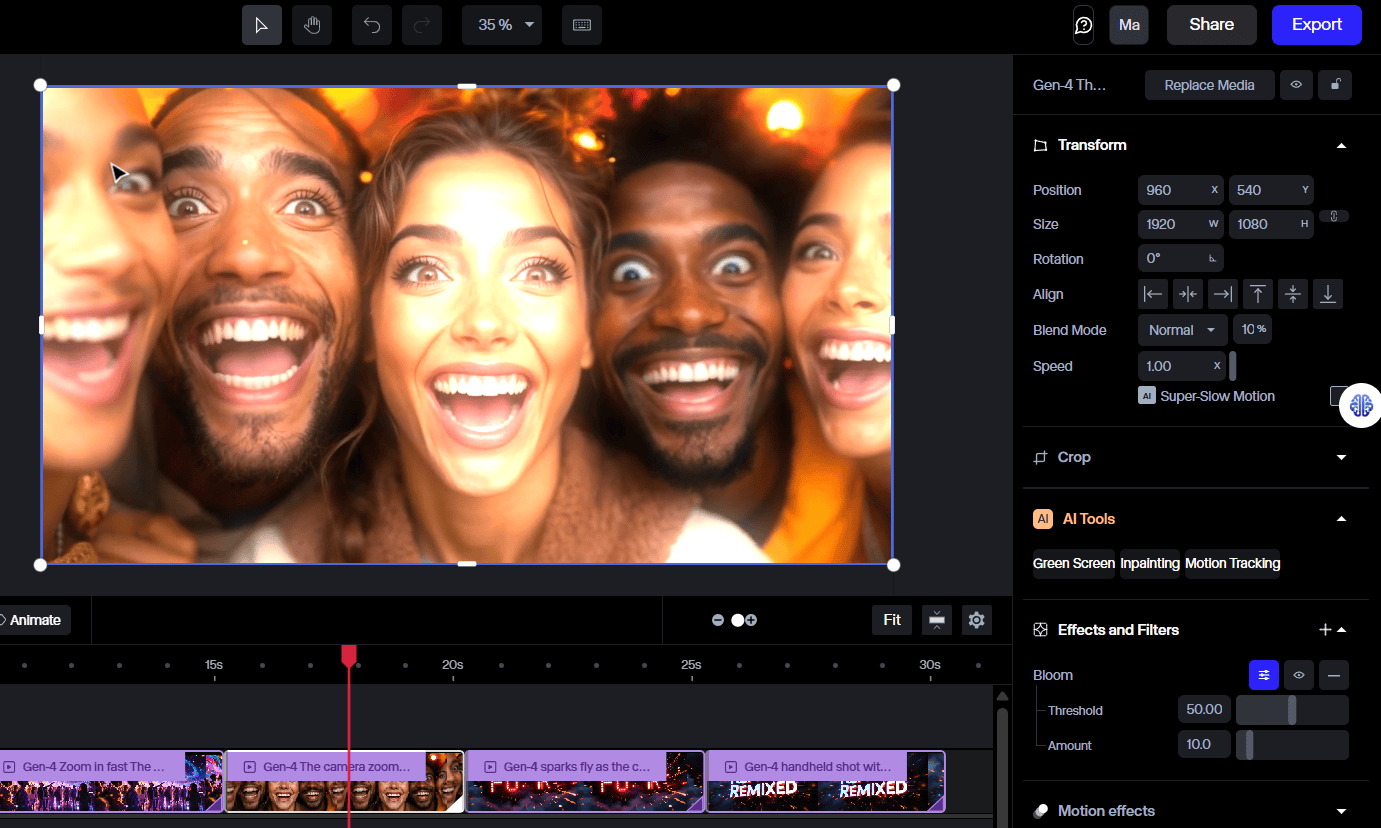
Step 3: Apply available effects and filters by selecting one or more clips on the timeline then opening the ‘Effects and filters’ panel on the right. We’ve applied a ‘bloom’ effect to the clip of the amazed faces:

Additional AI tools are available to apply greenscreen, inpainting and motion tracking.
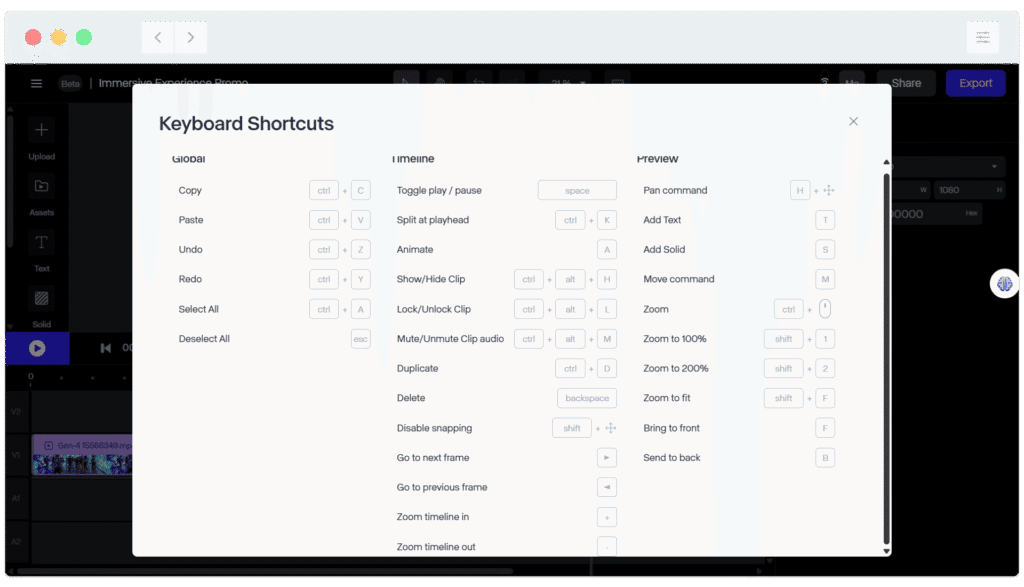
The keyboard shortcuts used by the video editor: