All our creative explainer series are waffle-free and work-tested. That’s the pixels.cool guarantee!
Assemble the book manuscript in Word
Overview
Name of part 5: Assemble the book manuscript in Microsoft Word
Creative theme: Design and publish a puzzle book using Book Bolt Studio and Amazon KDP
Applications used: Book Bolt Studio, Amazon KDP, Image editing software (E.g. Photoshop or Paintshop Pro), Replicate AI (For AI image generation), MS Word
User level: BEGINNER
This is part 5 of 6 in this series
This series includes:
- Plan the book and overview the applications used
- Create a Wordsearch puzzle in Book Bolt Studio
- Generate puzzle number images and artwork using generative AI
- Design the book cover and assemble puzzle pages in Photoshop or Paintshop Pro
- Assemble the manuscript in Word
- Publish the book using Amazon KDP
The published book at the end of this series
‘These are the Classic Movies wordsearches you’re looking for!’ is live on Amazon now:
The design, build and publish process in 2 minutes!
This creative design series is complete in six parts. Here’s the entire process from creating lists of movie-themed words through to publishing the book using Amazon KDP in two minutes 🙂
Why build the manuscript in Microsoft Word?
‘Manuscript’ is the term used for the ‘book file’ you’ll upload to Amazon KDP. It includes your entire book contents (apart from the cover). The KDP system will only accept a PDF file as a book manuscript. When we were creating our previous puzzle book last year, we found Word’s PDF export option to be the most robust for creating a ‘perfect’ PDF file to upload to Amazon. For this reason, we’re using it again now. Other document editors including Google Docs and Libre Office Writer also include PDF export options, but we have not tested them.
NOTE: If you choose to create the entire puzzle book directly inside Book Bolt, you can also export a compliant PDF from there to upload.
We’re using the desktop Word application for this process. We start with a new, blank Word file below.
Add the puzzle pages to a Word document
01: We start by setting the page size to match the printed page size for the book. As the book will be 7 inches wide x 10 inches high, we’ve set this precisely in Word as below:
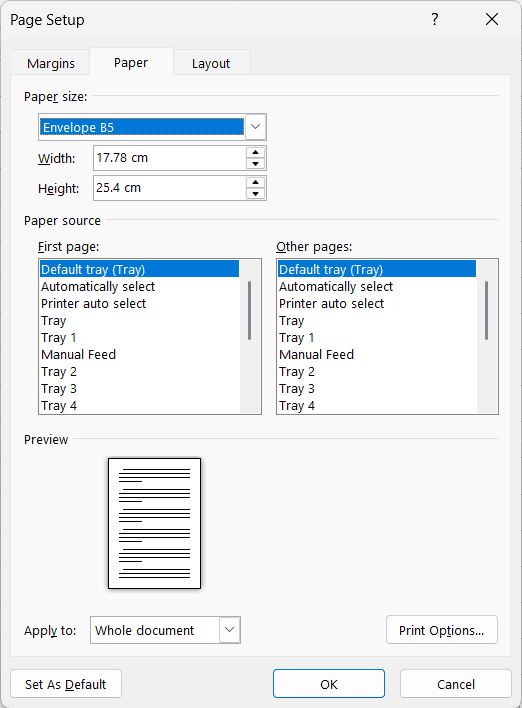
NOTE: ‘Envelope B5’ size is very close to 7×10 inches, but not exactly right. Above, we’ve selected ‘Envelope B5’ then entered the precise size manually.
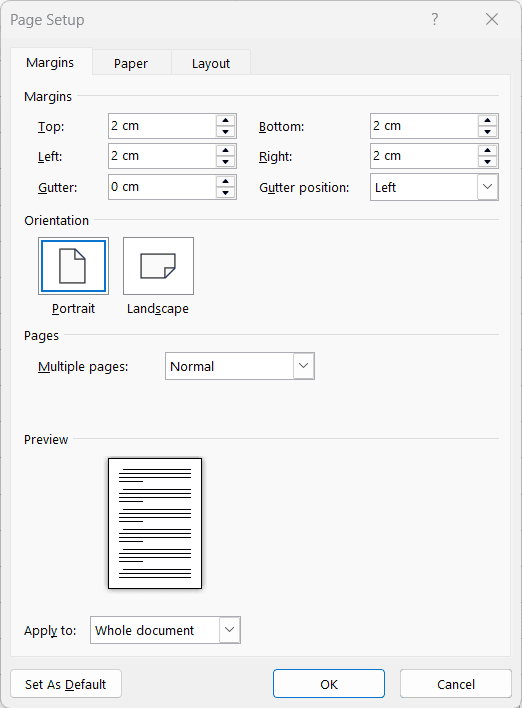
02: Set the top, bottom, left and right margins to be 2cm. This is wide enough to ensure no text or images will ‘run off’ the side of a page when it is printed:
03: To ensure every puzzle is added in the same place on each page, a grid overlay is used. We’ve set Word to show a grid line every half centimeter:

Now, when we bring in the puzzle images saved from from Paintshop Pro / Photoshop, they can be ‘snapped’ into place, ensuring we don’t need to spend a lot of time visually aligning them on each page.
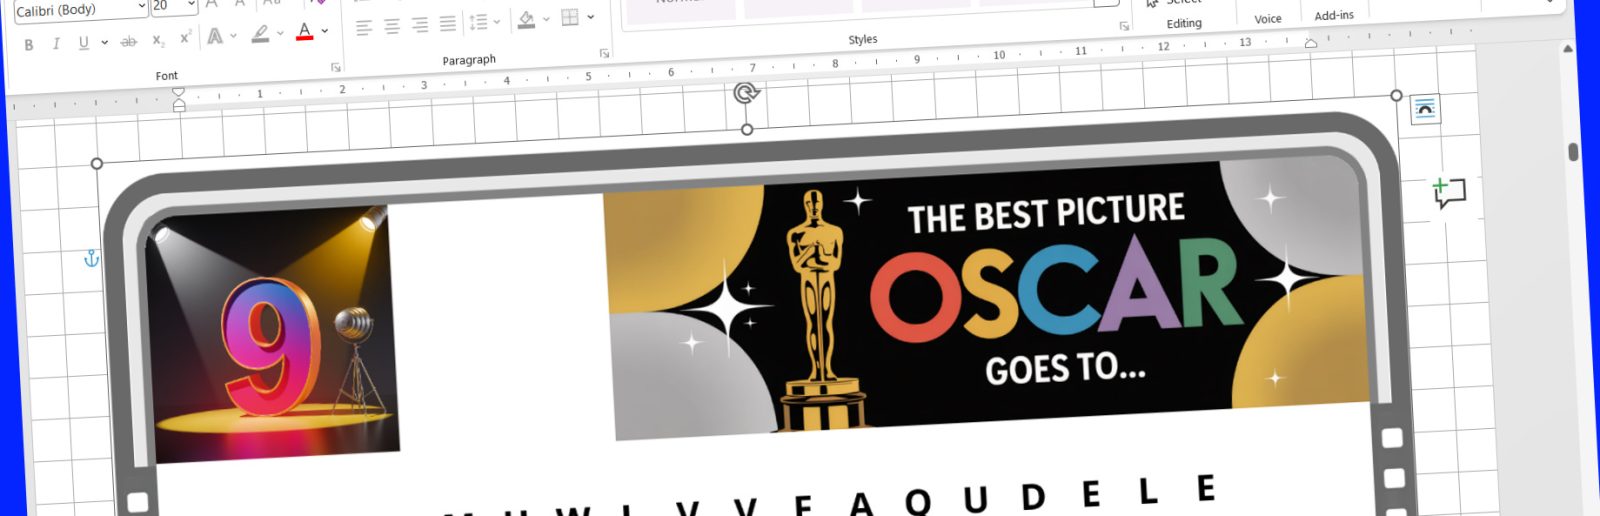
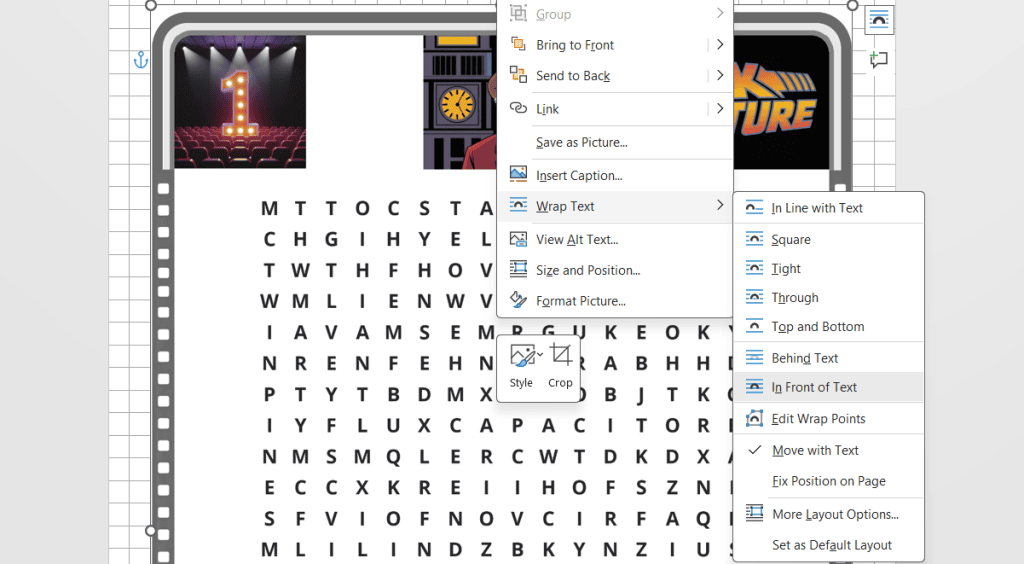
04: Drag and drop a saved puzzle PNG file directly on to a blank page in Word, then move and resize it as needed so it ‘snaps’ into place, leaving a page border of 2 grid squares on every side (including the bottom side). This border is indicated by the red arrows below:
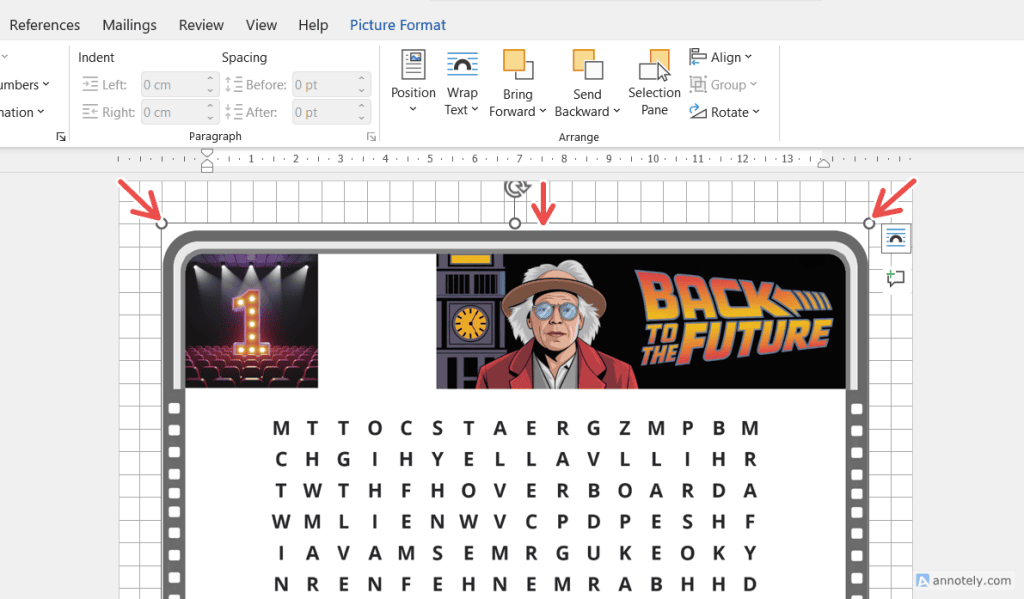
Note: If you find Word won’t let you move the image around freely on the page, right click on the image then select ‘Wrap Text > In front of Text’. The image will now move and snap freely:
05: Repeat the above process to add all the puzzle pages to the file.
Good practice tips:
- If you are saving the Word file locally to your computer, remember to save often and consider saving a new version occasionally (E.g. ‘Movies wordsearch book manuscript v1’, ‘Movies wordsearch book manuscript v2’ etc). If you are saving to a cloud location, your file should save automatically.
- Review the pages occasionally to ensure you don’t have any pages where you’ve accidentally placed the image too far up or down the page!
Add solutions pages to the document
As with the puzzle pages, drag and drop a saved puzzle solution PNG image on to a blank page then adjust the size as needed to allow a ‘two squares’ border on every side:

Add ‘fun fact’ information to each puzzle
We’ve found that the easiest way to include a ‘fun fact’ with each puzzle is to add it directly in Word. This makes it easy to edit and is quicker than using the text tool in PaintShop Pro or Photoshop and saving it as part of the puzzle image.
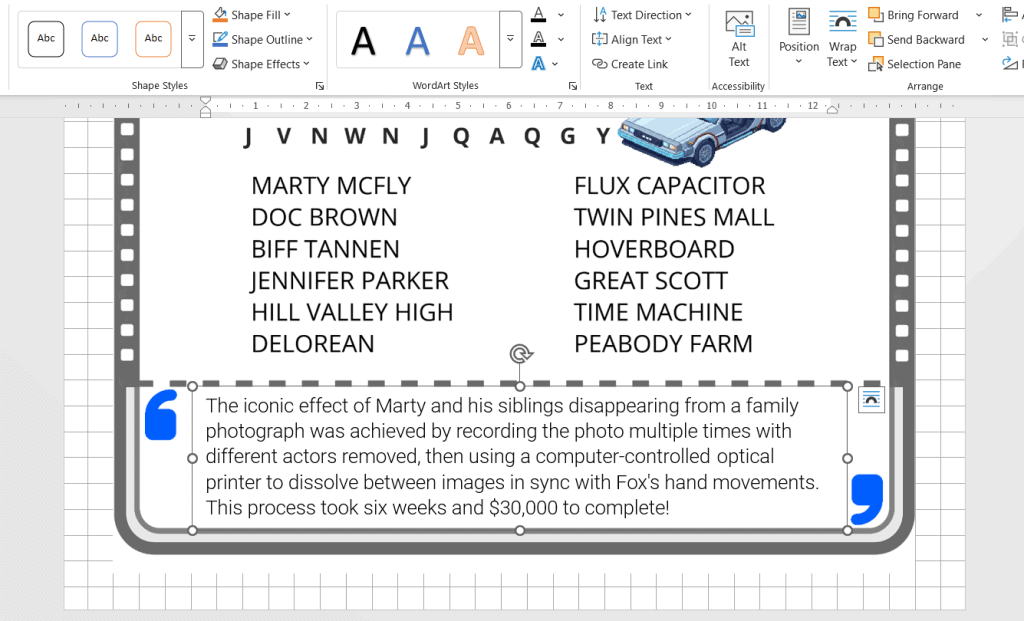
01: Add a text box by going to Insert > Text Box and position it near the bottom of the puzzle. We’ve pasted in the text for the ‘Back to The Future’ puzzle:
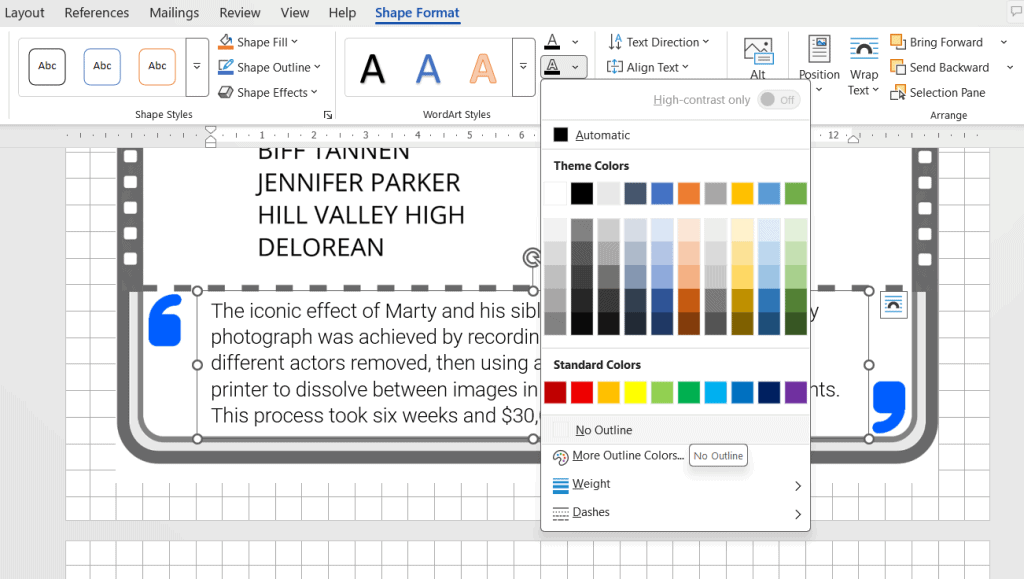
02: Word will add a thin border to a text box by default. To remove this border, in the ‘Shape Format’ menu, click on the small downwards facing arrow next to the outlined A icon, then select ‘No Outline’. You now have an ‘invisible’ box around the fun fact!
03: Copy and paste the text box to the next puzzle and edit the text as needed. Repeat this process for all the puzzles!
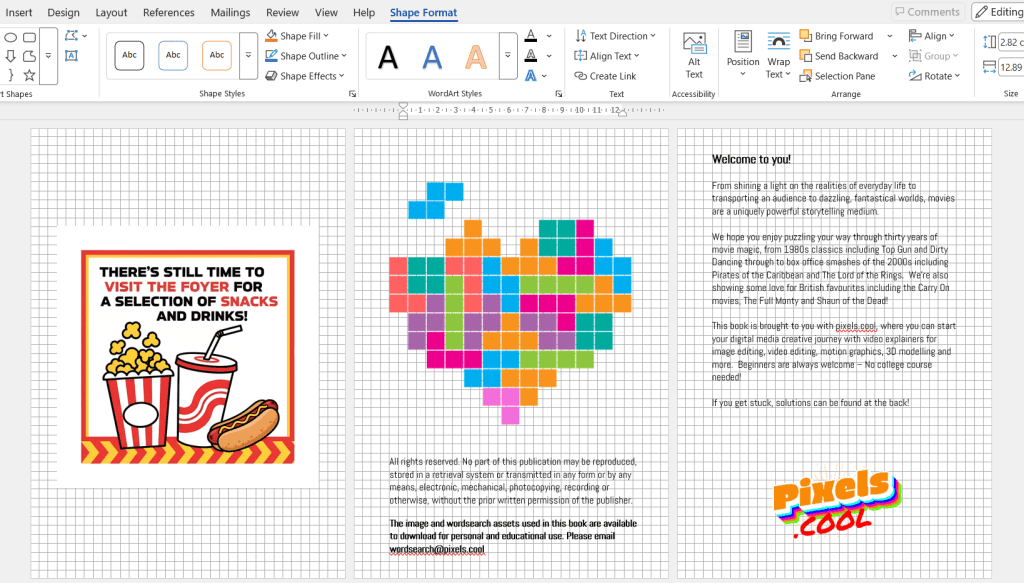
Once all the puzzles, solutions and fun facts have been added to the Word file, remember to add an introductory page or two, and maybe a couple of wrap-up pages at the end. Of course, this is completely optional. Here are the near-final introduction pages we added to our book:
And at the end of the book…

Export the Word manuscript to a PDF file
The final step is to export the completed Word file as a PDF file, ready to upload to Amazon KDP. Take care to follow the steps below to export a high quality PDF file.
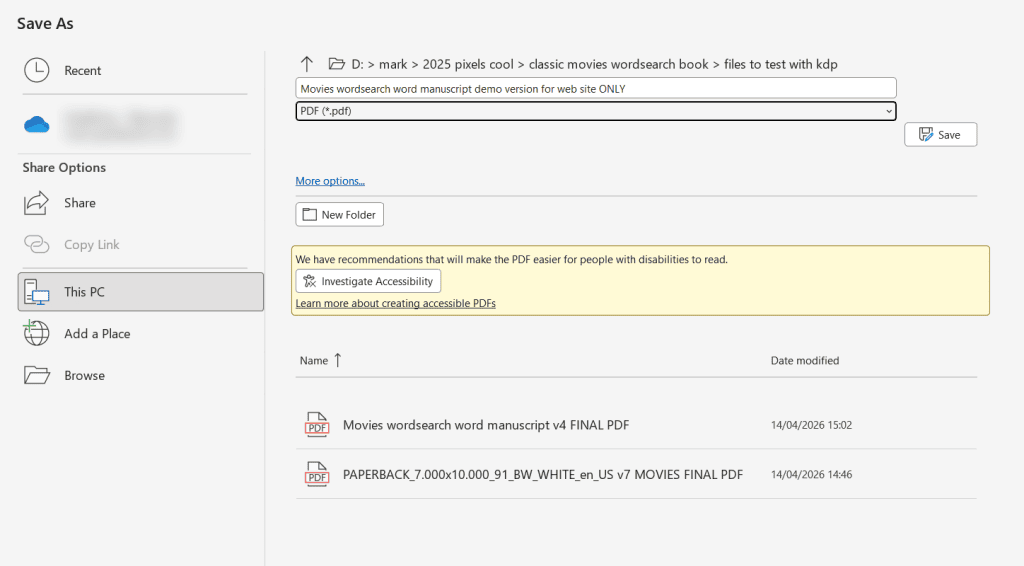
01: Go to File > Save as, then change from ‘Word file’ to PDF. Next, click the ‘More options’ link:
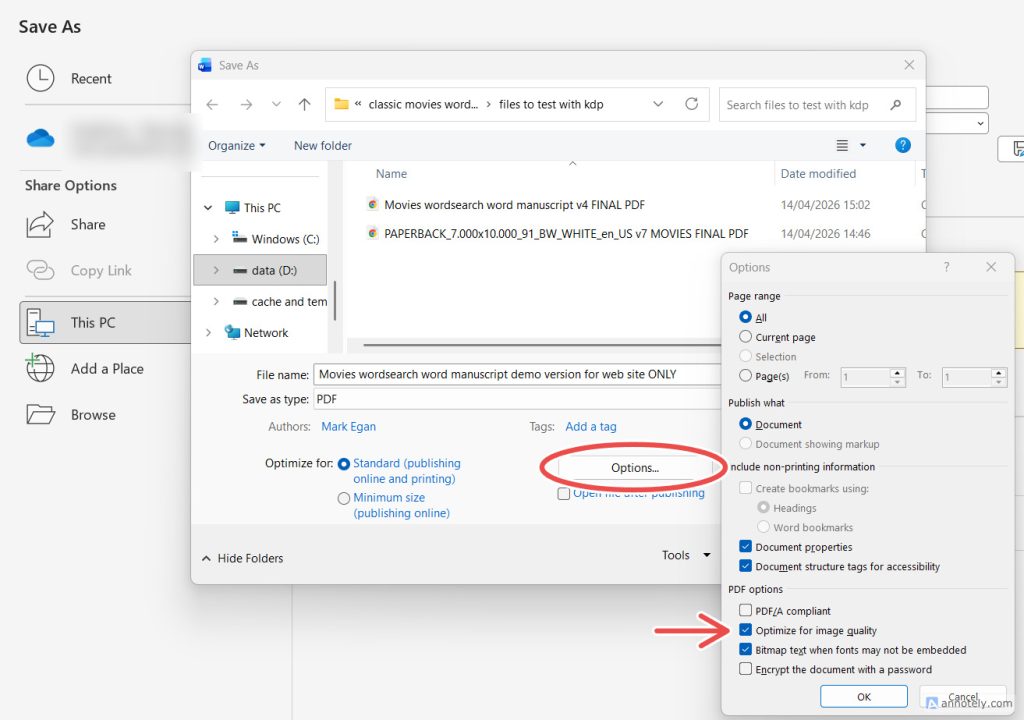
02: Click the ‘Options’ button circled below then make sure ‘Optimize for image quality’ is switched on (See the red arrow). Click OK then click Save.
To check the exported PDF, open the saved file. On a windows computer, it will open in a web browser. Check through it to ensure there are no obvious issues with alignment, missing elements or fonts not looking the same as before.
We’re ready to bring everything together when we upload the manuscript file and the cover image to Amazon KDP!
The finished, published book
‘These are the Classic Movies Wordsearches you’re looking for’ is available now at Amazon!
…and as a digital download from Etsy!
Need help? We’ve got you!
We have a dedicated support email address to provide assistance for this series:

If you have a question about any of the processes shown, please get in touch! You can also request copies of the wordsearch / image assets we use so you can try them for yourself!
Note: This email is for help relating to this series only, until the end of September 2026. We aim to reply within 72 hours, weekdays only. We cannot respond to unrelated queries via this account.
What’s next?
In part six we’ll create our book in Amazon KDP and get it published!
Notes and updates
There are no notes or advisories at this time. This page was first published in June 2026.
pixels.cool is not responsible for the content of external webpages or for software downloaded from third party sites. Links are included in good faith at the time of writing. All explainer / walkthrough content is compiled using processes and methods used by the Team. Modern applications offer many ways to accomplish a task, and for reasons of clarity we choose not to refer to multiple options. All computer users should run up to date virus / security software at all times to minimise the risk of data loss.